
- How do I log in to my site?
- How do I add a page?
- How do I edit a page?
- How do I change the settings (name, security, etc.) for a page?
- How do I make a copy of a page?
- How do I delete a page?
- How do I restore a deleted a page?
- How do I add a module (text, blog, forum, etc.) to a page?
- How do I edit a module on the page?
- How do I move a module on the page?
- How do I copy a module to another page?
- How do I delete a module on a page?
- How do I restore a deleted module?
- Where can I buy DNN modules and skins?
- How do I download a backup copy of my site?
- How do I restore a backup copy of my site?
- How can I learn more about DNN?
- Which browsers can I use to maintain my DNN site?
- How do I update the copyright notice / date displayed on my site?
- Should I upgrade to the latest version of DNN?
- What is the procedure to upgrade DNN on a site?
- Why are DNN pages very slow to load some times and not others?
- What should I do for search engine optimization (SEO)?
1. How do I log in to my site?
You need to log in to your DNN site to do all administrative tasks (i.e. add, edit, move, delete modules or pages). All the subsequent questions assume you are logged in to your site.
To log in:
- Click on the “Login” link usually located in the upper right corner or bottom of the page (depending on your site design).

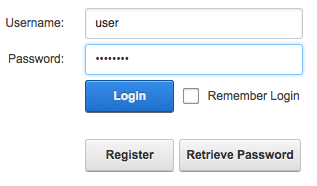
- Enter your User Name and Password in the form.
If you have forgotten your password, select the “Retrieve Password” link on this page. If you have forgotten your User Name (and you are one of our clients), please contact us for help. - (Optional) Check the “Remember Login” to have the browser save your login information.
- Click the Login button.
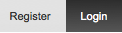
Once you are logged in, you will see the “Login” link change to “Logout” and your name will be displayed next to this link.

Note: Even if you have “Remember Login” checked, the site will occasionally ask you for your password as a security measure.
2. How do I add a page?
To add a page to your site:
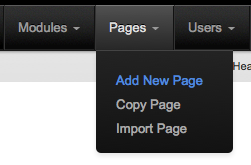
- Navigate to “Pages” at the top control panel bar and click “Add New Page”.
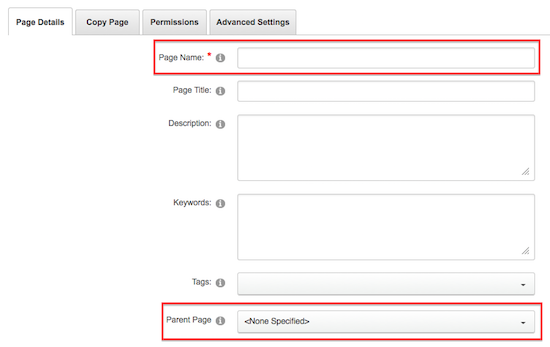
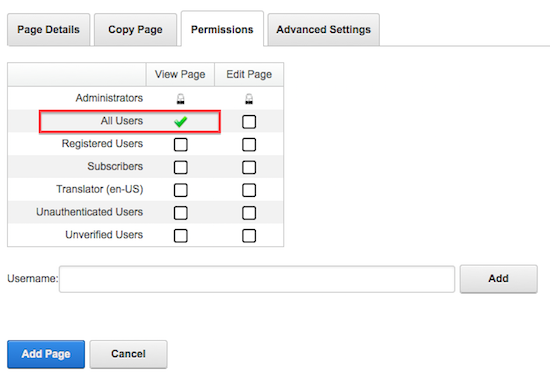
- On the “Page Management” form, enter the “Page Name”. This is the name that will be displayed in the menu and on the browser’s title bar. Note: You do not need to enter a Page Title unless you want to override the title automatically generated by DNN that includes the complete path to this page.
- Click the “Permissions” tab and check “All Users” “View Page” box if the page is ready to be seen by all users. Or you can do this later.
- (Optional) Set the Parent Page of this page (if it should be organized under one of the main pages on the site).
- Click the “Update” link at the bottom of the page to save your changes.
Once you have added a page, you can add modules, add content to those modules, etc.
3. How do I edit a page?
To edit a page:
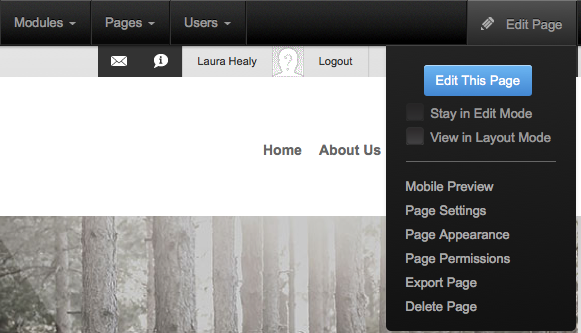
- Hover over “Edit Page” in the top right corner of the control panel bar. Then click the “Edit This Page” button.
This will put all modules in Edit mode.
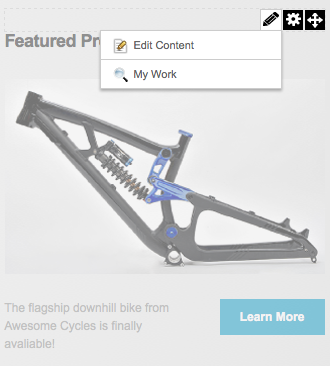
You can then edit any individual module. To “Edit Content” in the module, hover over the “Pencil” button and click “Edit Content” (usually near the upper right corner of the module, depending on the skin).
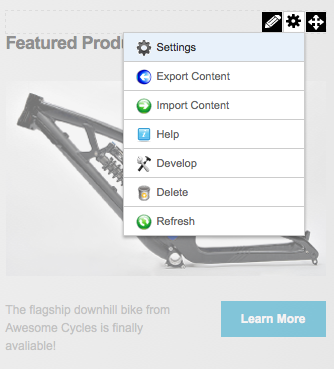
To change the “Settings” of the module, hover over the “Settings” button and click “Settings” (usually near the upper right corner of the module, depending on the skin). You may also delete the module this way by clicking “delete”.
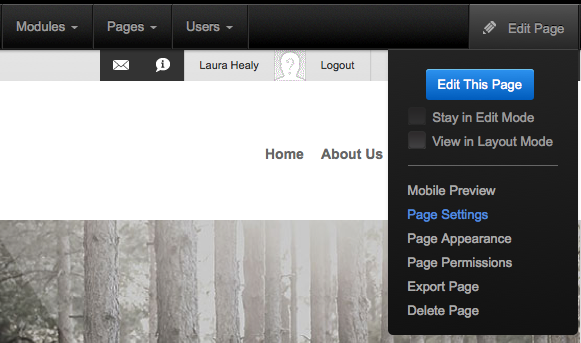
4. How do I change the settings (name, security, etc.) for a page?
To change page settings (like its name):
- Navigate to the page.
- Hover over the “Edit Page” in the top right corner of the control panel bar. Click “Page Settings”.
5. How do I make a copy of a page?
You may want to copy a page for any number of reasons:
- To use the original page as a template for a similar page
- To work on a major overhaul of the page
- etc.
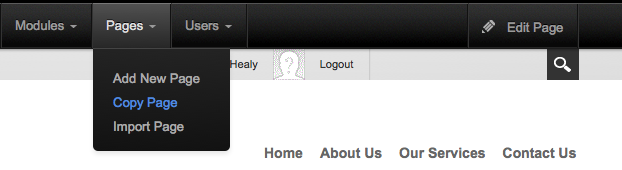
To copy a page:
- Navigate to the page.
- Hover over “Pages” in the control panel bar and click “Copy Page”.
- On the “Page Management” page, notice the “Copy Page” tab of settings. Here, under “Specify Modules”, you can pick and choose which modules to copy and what kind of copy to make. (See below for more details on this.)
- Press “Add Page” to complete the copy.
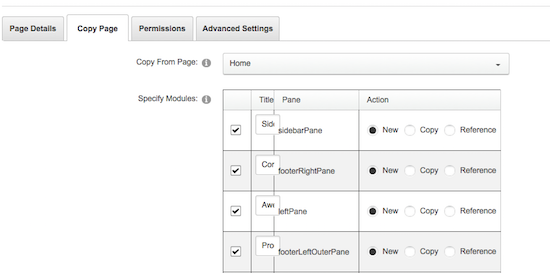
There are three kinds of “copy”:
- “New” creates a new (empty) instance of the module on the new page.
- “Copy” copies the module and its content to the new page.
- “Reference” creates a reference to the original module on the new page (i.e. both pages shares the same module and content).
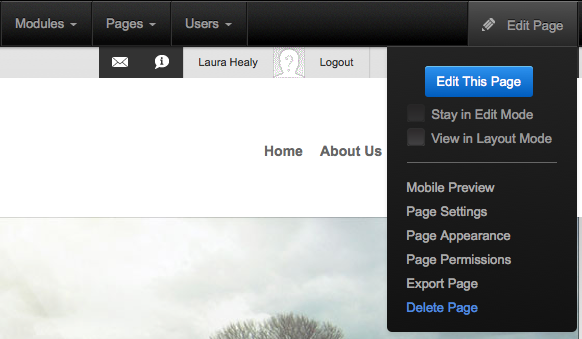
6. How do I delete a page?
To delete a page:
- Navigate to the page.
- Hover over “Edit Page” in top right corner of the control panel bar. Click “Delete Page”.
If you accidentally delete a page, you can restore it.
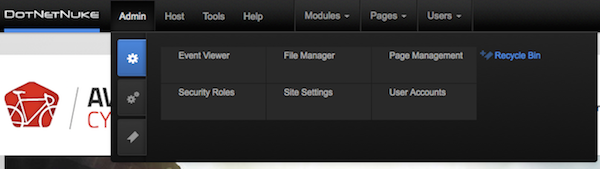
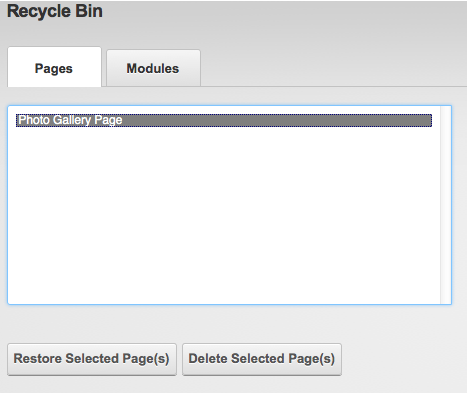
7. How do I restore a deleted a page?
To restore a deleted page:
- Hover over “Admin” and click “Recycle Bin” from the control panel bar.
- From the “Recycle Bin” page, select the page you wish to restore from the Pages tab.
- Press the “Restore Selected Page (s)” button to restore the page.
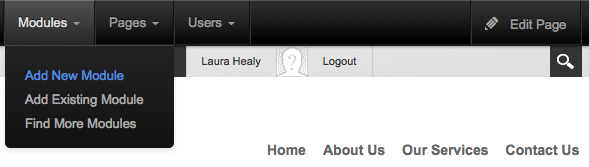
8. How do I add a module (text, blog, forum, etc.) to a page?
To add a module to a page:
- Navigate to the page
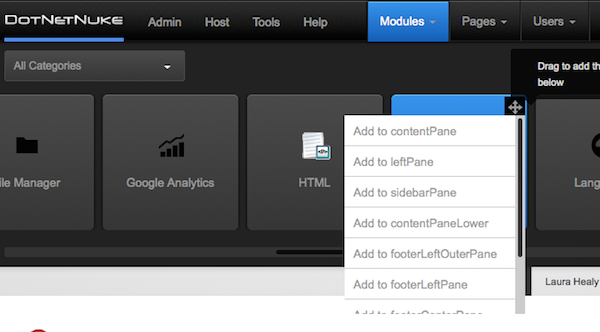
- Hover over “Modules” in the control panel bar and click “Add New Module”.
- Choose the module you wish to add and use the “Move” button to place the module in the layout pane of your choice. Often, you will choose the Content pane.
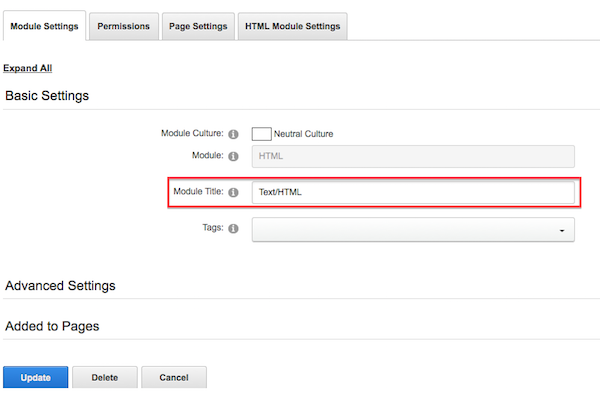
- Click the “Settings” button on the top right corner of the new module and type in a Title for the module to identify it. (If you leave it blank, the module will set a name by default.) Click “Update” at the bottom.
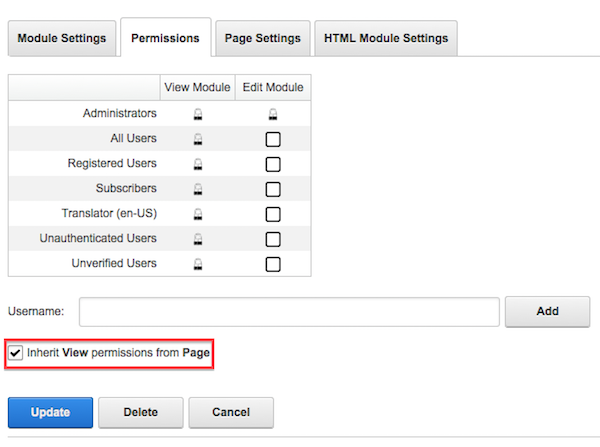
- The Visibility of the module is automatically set to allow all users to view the module. To change this, click the “Permissions” Tab and uncheck “Inherit View Permissions from Page”. You will notice that locks disappear from the check boxes under “View Module”. Click “Update” at the bottom.
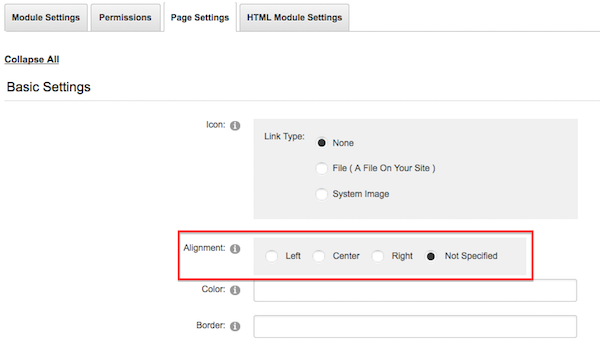
- (Optional) To set the Align setting for the module, click the “Page Settings” tab. Often, you will set this as “Left”. You have more complete control over text alignment within the Text/HTML module itself. Remember to click “Update” at the bottom.
Once you have added a module, you will most likely need to edit its contents or settings.
9. How do I edit a module on the page?
How you edit the settings and content of a module depends on the module itself. All modules have a “Settings” button and a “Pencil” button in the upper right corner of the module. The “Pencil” button is used to “Edit Content”.
To edit a module’s settings:
- Hover over the “Settings” button in the upper right corner of the module and click “Settings”.
- Make any desired changes and select Update when done.
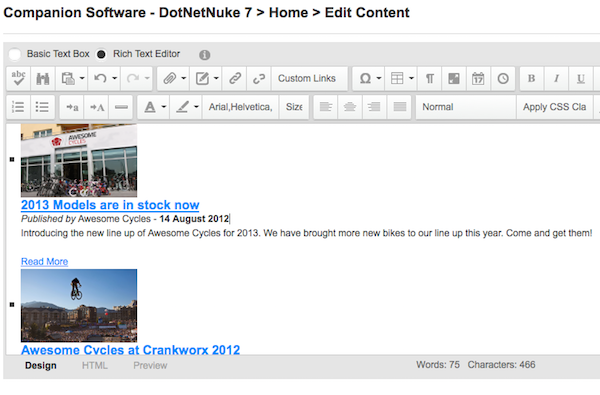
To edit the Text/HTML module text:
- Hover over the “Pencil” button in the upper right corner of the module and clock “Edit Content”.
- Make your changes in the text editor.

- Select Update (near the bottom of the page) when you’re done.
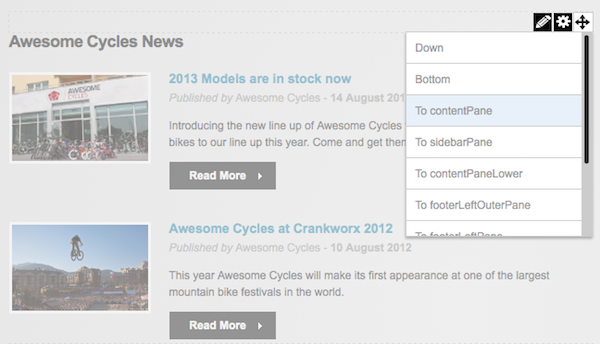
10. How do I move a module on the page?
To move a module on the page:
- Hover over the “Move” button in the upper right corner of the module.
- Choose which layout pane you would like to move your module to.
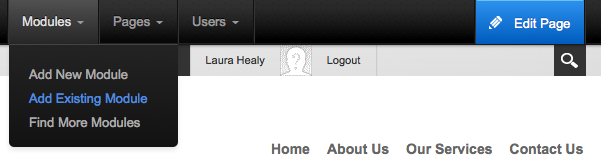
11. How do I copy a module to another page?
You can create a reference to an existing module on another page via the “Add Existing Module” setting in the control panel bar. This allows both pages to share the same module and content. It does not make a separate copy of a module.
To add a reference to a module from another page on the current page:
- Hover over “Modules” in the control panel bar and click “Add Existing Module” (not the page with the module on it).
- Select the Page that contains the module that you want to reference.
- Select the Module from that page that you want to reference.
- Set the Pane for the modulue by clicking the “Move” button in the upper right corner. Often, you will set this as Content Pane.
- The Insert point for the module is automatically set as “Bottom”. Note this option only applies to new module’s position in the Pane. You can always change the position from the module’s Move button later.
- To set the Align setting for the module, hover over the “Settings” button and click “Settings”. Choose the “Page Settings” tab and choose the desired alignmnt. Often, you will set this as “Left”. You have more complete control over text alignment within the Text/HTML module itself. Remember to click “Update” at the bottom of this form when you are finished with the settings.
Note: This technique can be used to move a module from one page to another. First, make a reference to the module on a new page, then delete it from the old page.
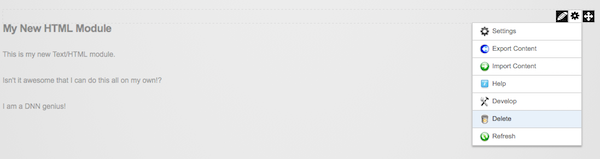
12. How do I delete a module on a page?
To delete a module:
- Hover over “Settings” button in upper right corner of module. Click “Delete”.
- Press “OK” to confirm the deletion.
If you accidentally delete a module, you can restore it.
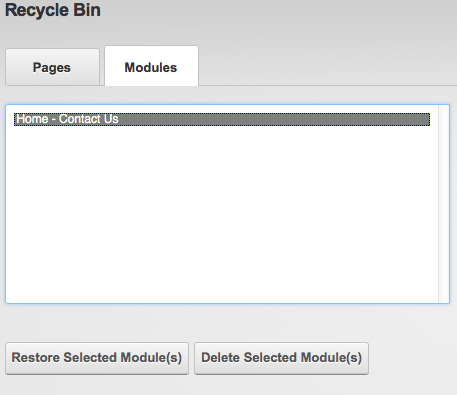
13. How do I restore a deleted module?
To restore a deleted module:
- Hover over “Admin” in the control panel bar and click “Recycle Bin”.
- In the Modules tab, select the module you wish to restore. Note that the most-recently deleted module is at the bottom of the list.
- Click “Restore Seleceted Module (s)”.
14. Where can I buy DNN modules and skins?
We recommend two places where you can buy DNN modules and skins:
- DNN Store
- Using Google to find DNN modules and skins. Not every skin and module are in the DNN Store.
15. How do I download a backup copy of my site?
It is very important to back up your site on a regular basis. Dynamic DNN sites are different than the “old-fashioned” static HTML sites of the past. DNN site can be constantly updated by any authorized users. All the site content and changes is kept in a database. Therefore, there may be no “backup” copy of the site unless you make a copy of the site files and database.
Now, most web hosting providers do back up their computers and databases on a regular basis. However, it is certainly prudent to download your own backup periodically.
How you back up your site depends on your web host and the site control panel that they use. Below, we document the basic steps for creating and downloading backups from:
- PowerDNN using the Parallels Business Automation control panel, and
- 3Essentials
Another alternative is to use the excellent DNNBackup module from Evotiva.Then you can manage and download your backups directly from your website.
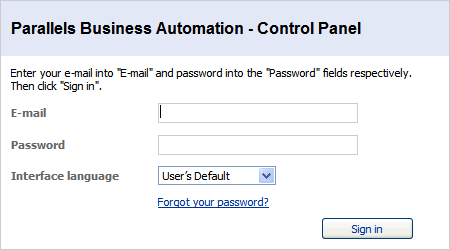
To download a site backup on PowerDNN using the Plesk control panel:
- Sign in to your PowerDNN web host control panel. (See your “Credentials” document for your username and password.)
- Select “Domains” from the top menu and select your domain.
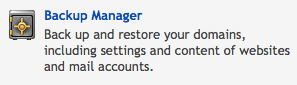
- Select the “Websites and Domains” tab and click “Backup Manager”.
- If your site is set up to do regular automatic backups, there will be a list of the most recent backups. Click the download button from the list to download the most recent backup. You are done and can skip the rest of the steps. Otherwise, select “Create Backup” button.
or - Make sure “Store Backup in” is set to “Server repository”.
- Enter a “Backup file name”. We recommend a name that contains the domain name and current date and the “.zip” extension (e.g. “MyDomain.com2008-01-13Backup.zip”)
- Uncheck “Suspend Domain”. (You can usually leave your domain running while the backup is being done. Check this if there is a problem completing the backup.)
- Enter your email address in the “Notify by email” field. In this way, you don’t have to wait for the backup to complete. You will be notified by email when it is done.
- You can check or uncheck “Backup the content of mailboxes” as desired.
- Click the “Back Up” button on the bottom of the page.
- Once the backup is complete, it will be listed in the repository and can be downloaded as described in step 4.

 or
or 


3Essentials hosting performs the backup for your site. In order to have a backup of your site, you must submit a support ticket asking 3Essentials to do so.
16. How do I restore a backup copy of my site?
Restoring a backup is best done by contacting your web host and working with a support representative.
17. How can I learn more about DNN?
There are many ways to learn more about DNN. Please understand that DNN is a very rich system. It would take a lifetime to understand everything about the system. So the best strategy is to find help with the portion of the system you are interested in.
Here are some resources that I am aware of (and my comments about them):
- The DNN manuals have a lot of information but may be overwhelming to a beginning user. Start with the User Manual; check out the SuperUser Manual for more advanced topics.
- The DNN website also has many other resources. The DNN site is the primary source of information about the platform.
- The DNNCreative online magazine with an extensive video library of “how to” videos. A subscription is about $78 / year, but well worth it (I subscribe). While there are a good number of “beginner” videos in there, this library is most useful to more advanced users.
18. Which browsers can I use to maintain my DNN site?
You can use just about any modern browser to edit DNN sites. I have used the latest versions of Internet Explorer, Firefox, Chrome, Opera and Safari without any major issues. If you have a problem with a particular combination, make sure you are using the latest version of the browser and that your site is using the current version of DNN.
Currently, Firefox is my preferred browser because it works well with DNN sites and performs equally well on Mac or Windows. I also use Google Chrome and Apple Safari. Internet Explorer is my least favorite browser because it is the least standards compliant, but it certainly can be used as well.
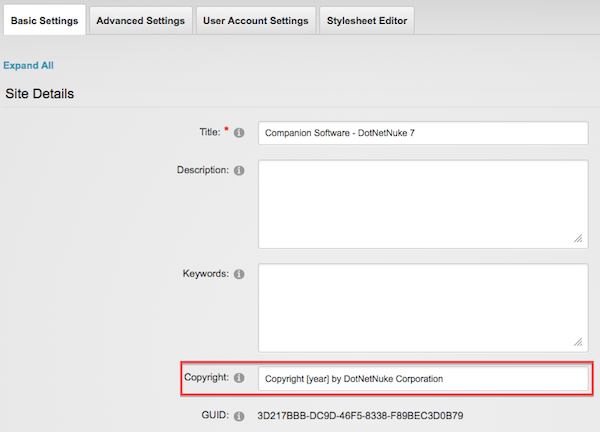
19. How do I update the copyright notice / date displayed on my site?
To update the copyright notice (and other settings that affect the site as a whole):
- Hover over “Admin” in the control panel bar and select “Site Settings”.
- Edit the Copyright field.
- Scroll down near the bottom of the page and select Update.
20. Should I upgrade to the latest version of DNN?
When you log in to your site, you may see an “Updates Available” graphic like these at the top of the Control Panel:


These indicate that there is a DNN update or critical update available for download from the DNN website. Like most computer software, DNN frequently comes out with minor and major upgrades and security updates. These updates often fix obscure, but significant problems. It is a good idea to upgrade to the latest stable version periodically (just like with any software program you use on a regular basis). However, if you installed every new release that comes out, you’d be upgrading every month or so – not usually a desirable thing.
So the question is, “If I see one of these buttons, should I upgrade to the latest version of DNN?”
The answer: a definite maybe. It is usually safe to upgrade, but the decision to upgrade depends on a number of factors including:
- How big a jump is the upgrade? Little upgrades are usually the easiest, but provide the least benefit. On the other hand, the longer you wait, the harder the upgrade. But you don’t want to get too far behind or else you won’t be able to use the latest modules and skins.
- Does the upgrade fix a problem your users are experiencing? “If it ain’t broke, don’t fix it.”
- Does the upgrade fix a critical security problem that may affect your site? You may not know it, but your site might be vulnerable to hackers.
- Are all my modules and skin supported on the new version of DNN? If you upgrade, you may have to update some modules and/or your skin.
- How long has the new release been out? Do you really want to be the first site to install a new release? You might want to wait a week to make sure it is stable.
- Do you have a complete backup in case something goes wrong? Upgrades usually go smoothly, but if they don’t you absolutely need a backup.
- Can your budget afford the upgrade? Unless you do the upgrade yourself, expect to pay $25 – $120 per upgrade (more if anything goes wrong). Most professional sites don’t install every new DNN release, but they do upgrade periodically.
- Can you afford a little downtime? Your website will be unavailable for about 10 to 15 minutes while the upgrade is being performed. This could be longer if there are any problems. So make sure you do the upgrade when you can afford some potential downtime.
The bottom line is that you don’t have to apply every upgrade, but you should probably upgrade on a regular basis to keep up with fixes, improvements and critical security patches.
21. What is the procedure to upgrade DNN on a site?
Here is one professional way to upgrade DNN on a site:
- Backup your files and database. It is essential that you backup both your files for the site and the database for the site. If available, you can use a Control Panel command like the Plesk > Domain > Backup command. Or use the excellent DNNBackup module from Evotiva. It is also important to verify the backups to make sure they really are a valid backup. This can be done as part of step 2. (Step 2. assumes your site has a site alias such as “localhost/MyDomain.com”. If not, add it to your live site via Admin > Site Settings before doing the backup.)
- Install the backup on a local computer. Restore the files and database to a local computer (localhost), so you can test the upgrade on a different computer instead of using your live site as a ‘guinea pig’. This will also verify that your backup is good.
- Verify that the original localhost site is working properly before the upgrade. You don’t want to do the upgrade until you are sure the site is working properly.
- Download and unzip DNN install package to localhost installation. This is the heart of the upgrade. Go to the DNN website and get the latest installer. Make sure you get the upgrade installer if you’re doing an upgrade!
- Browse to http://localhost/MyDomain.com/install/install.aspx?mode=install. Replace MyDomain.com with your actual localhost site name. This will trigger the upgrade process to begin. Watch carefully for any error or warning messages as they may indicate a problem.
- Verify that the upgraded localhost site is working properly after the upgrade. This is a critical step. You want to make sure all the pages display right and that all the modules are working properly. If not, now is the time to see what needs to be fixed and what modules need to be updated. You can test the updates locally, but they will have to be reapplied to the live site, if needed.
- Add an app_offline.htm file in the root folder. This file this will disable DNN from responding to page requests, which will prevent someone else from trying to access a page (and triggering the upgrade) during the time in which you are extracting the DNN upgrade files in the next step. The contents of this file can be simple HTML saying something like “This site is currently unavailable due to scheduled maintenance. Please check back later.”
- Upload and unzip DNN install package to online site. Once you are happy with the localhost version of the site, you are ready to upgrade the live site.
- Remove (or rename) the app_offline.htm file. If you might use this file again in the future, simply rename it to “app_offline.htm.txt”.
- Browse to http://www.yourdomain.com/install/install.aspx?mode=install. Trigger the installer on the live site. Again, watch carefully for any error or warning messages as they may indicate a problem.
- Verify that the live site is working properly after the upgrade. This is also a critical step. You want to make sure all the pages display right and that all the modules are working properly. If you had to update anything for the local site, you need to reapply those updates to the live site.
This procedure assumes you have a local machine that is set up to run a DNN (ASP.NET) website. It can take a fair amount of time (maybe one to four hours) to complete the process but helps to minimize the risks of an upgrade.
If you want to assume more risk, you can just perform steps 1 and 7 – 11. I often do this for my clients that can’t afford or don’t want to do the complete localhost process. It works (taking an hour or less), but may require some scrambling after the upgrade to make sure everything is working.
And while I wouldn’t recommend it, you could skip the backup and just do steps 7 – 11. This is a bad idea, but in a pinch it works if you’re lucky (and only takes about 10-15 minutes if all goes well).
Also, steps 7 and 9 could be considered optional, but they do help to avoid a “premature” upgrade while you extract the upgrade files.
22. Why are DNN pages very slow to load some times and not others?
DNN pages can be slow to load sometimes. Here’s why (and how you can minimize the problem)…
DNN is basically a program that runs when requested by the web server. The web server is “smart” in a sense. If no one is requesting pages from the DNN program, after a while (typically 5-20 minutes of inactivity) it stops DNN, releasing the memory and CPU (processor) so they are available to do other work (e.g. for other web sites hosted on the same server) or to save energy (by going into a “quiet” state). In general, this is a good thing.
However, the “penalty” comes when a visitor requests the first page from your idle DNN site. The web server has to start DNN and that can take a few seconds. Then DNN can deliver the page. Usually, this is a small price to pay to keep the server running efficiently.
It is important to note that once DNN is running, all subsequent pages are delivered much more quickly for all users. And the server caches pages so it doesn’t have to ask DNN to regenerate them repeatedly in a short amount of time. So for a busy site, most users won’t ever see this delay.
Also, having DNN stop once in a while is not a bad thing. It allows the machine to reclaim memory and temporary hard disk space that is in use by the program. This “clean up” from time-to-time can help ensure that the system remains stable and can recover from possible “resource leaks”.
So, what can you do to minimize the delay?
- You could set a longer idle time before this happens. But you can’t do that on a shared hosting server (for good reason – so no one site can “hog” all the machine’s resources).
- Make sure your site only has modules installed that it uses. Having lots of unused modules installed simply wastes resources and makes your startup time longer.
- Use a service such as DNN Monitor or KeepAliveForever to periodically access the website, preventing it from shutting down (or at least minimizing the chances that a user will experience this).
- Put your site on a dedicated server. This costs more, but you are also not competing with a pool of other web sites vying for the same CPU, memory and disk.
- Put your site on a faster server with fewer competing web sites. While this is a possibility, in reality it might be hard to compare ISPs and get them to guarantee how many sites are on a machine and that they all will “play nice”. So if you are trying to do this, the easier path is to get a dedicated server (or a virtual dedicated server).
23. What should I do for search engine optimization (SEO)?
“Search Engine Optimization” (SEO) is the process of increasing your search engine rankings. By applying some easy tips, your website will start it’s climb to the top of Google or Bing searches. This will allow your prospective clients or customers to find you a lot more easily on the web!
Too busy or want a professional opinion on how to increase your google rankings? Contact us to learn more about our Search Engine Optimization Diagnostic.